🛠️ Managing platform navigation
This guide will walk you through accessing the navigation settings, customizing the logo/support sections, and adding new links to your main menu.
1. Accessing navigation settings
- Navigate to Platform Settings in the main left-hand sidebar.
- Under Platform Settings, click on General Settings.
- On the main content page, look for the SETTINGS SECTIONS list and click on Navigation.

2. Customizing logo and support highlights
On the Navigation settings page, you can customize the text that appears next to your platform's logo and in the support highlight section.
Logo Tagline
This is displayed beneath your logo on large screens to reinforce your brand promise.
- Headline: Enter the main title (e.g., "Premium learning storefronts").
- Supporting line: Enter an optional secondary line to reinforce your focus (e.g., "Strategy • Launch • Scale").
Support Highlight
This is shown beside the primary shop button to emphasize your learner support experience.
- Headline: Enter the main title (e.g., "Dedicated success team").
- Supporting line: Enter an optional description that appears beneath the headline (e.g., "Scale confidently").
- You can toggle the visibility of the Support Highlight using the Show highlight checkbox.
3. Adding and editing navigation links
You can add new links to your main platform menu under the Navigation Items section.
Adding a Top-Level Link
- Click the + Add top-level link button.
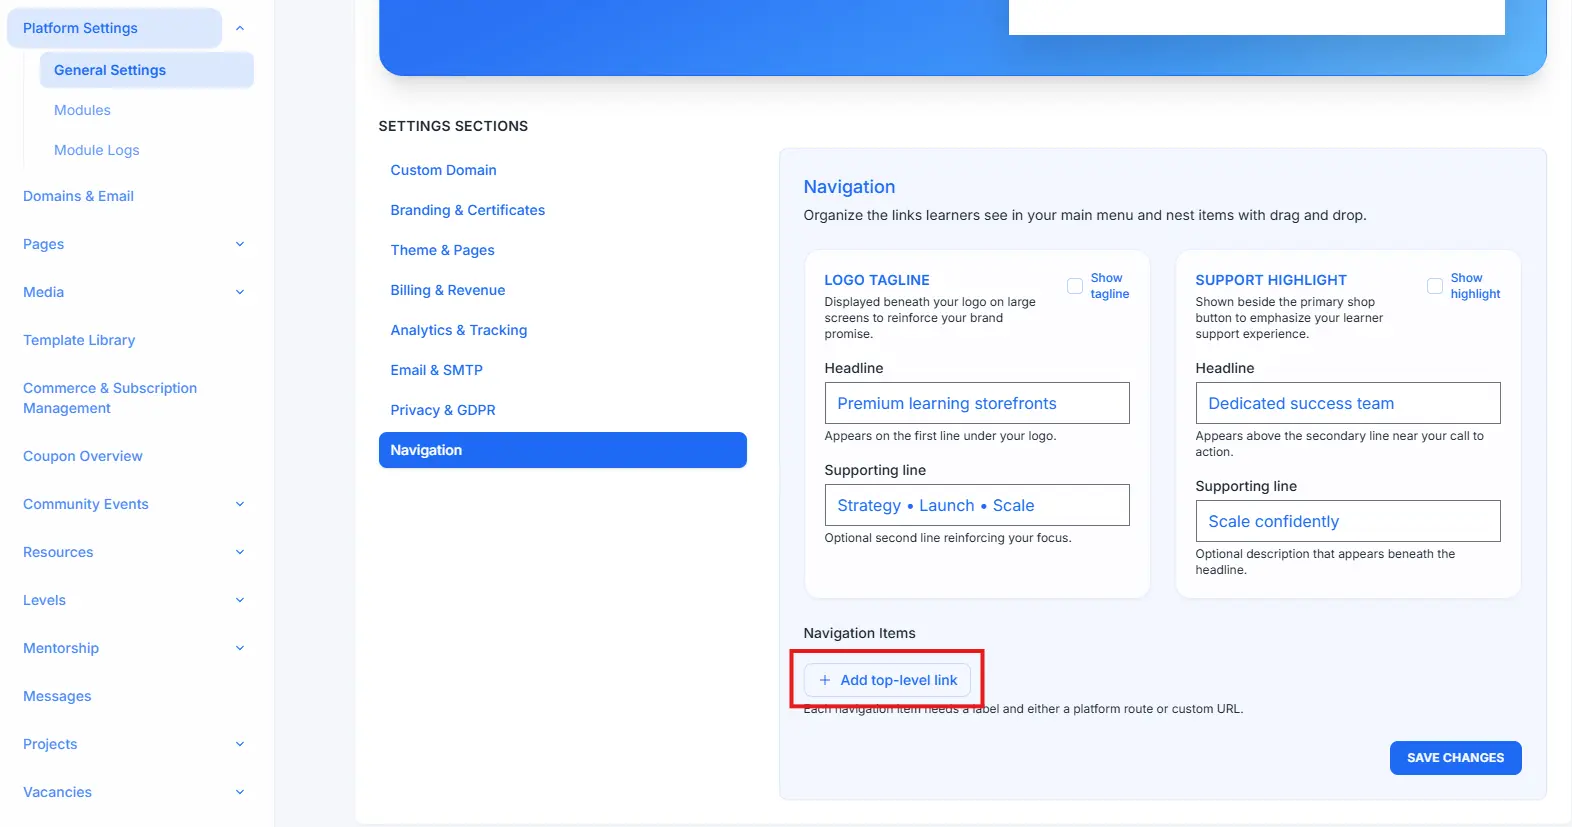
- A new form for the navigation item will appear.
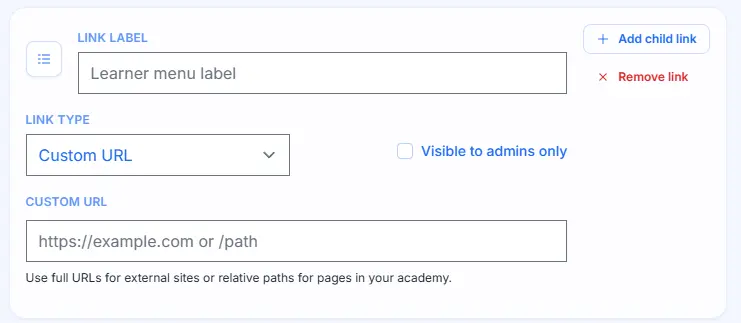
Configuring the link
- LINK LABEL: Enter the text that will appear in the navigation menu (e.g., "Learner menu label").
- LINK TYPE: Use the dropdown menu to select the type of link: Custom URL or Platform route.
- CUSTOM URL (if selected): Enter the full URL for external sites or a relative path (e.g.,
https://example.comor/path). - Visible to admins only: Check this box if the link should only be visible to platform administrators.
- + Add child link: Click this to create nested links (dropdowns).
- Remove link: Click this to delete the navigation item.
4. Saving Your Changes
After making all your desired changes to the logo text, support highlight, and navigation links:
- Click the SAVE CHANGES button at the bottom right of the screen to apply your new navigation configuration.